21/10/2013

Makeup Academy (MUA) Haul, Swatches and Review/First Thoughts


Recently I did some shopping on the MUA website: http://www.muastore.co.uk/index.php/ after watching a few videos on YouTube by Misstango2. My order came to $17.85 AUD for 7 items plus $12.74 AUD shipping, making the grand total $30.59. I'm going to show swatches and my first thoughts on the products.

I was really happy with how the items were packaged. They were all bubble wrapped and in a cardboard box.


First up is the Undressed palette. It is apparently the dupe for the Naked palette so I decided I would try this one out and then maybe buy the Basics palette as well. So far I'm liking it, most of the colours seem to be great quality and nice and smooth and buttery.
Unfortunately when I opened the package the first colour was broken and the powder had spread over the palette. Considering I had spent just over $12 in shipping I was going to write an email to the company, but then I realised the postie probably dropped it at the door :\ So I've just left it, it's not completely broken so..


Undressed palette swatches.


(I'm not sure why no.10 looks so light, but it's actually a medium/dark gold.)

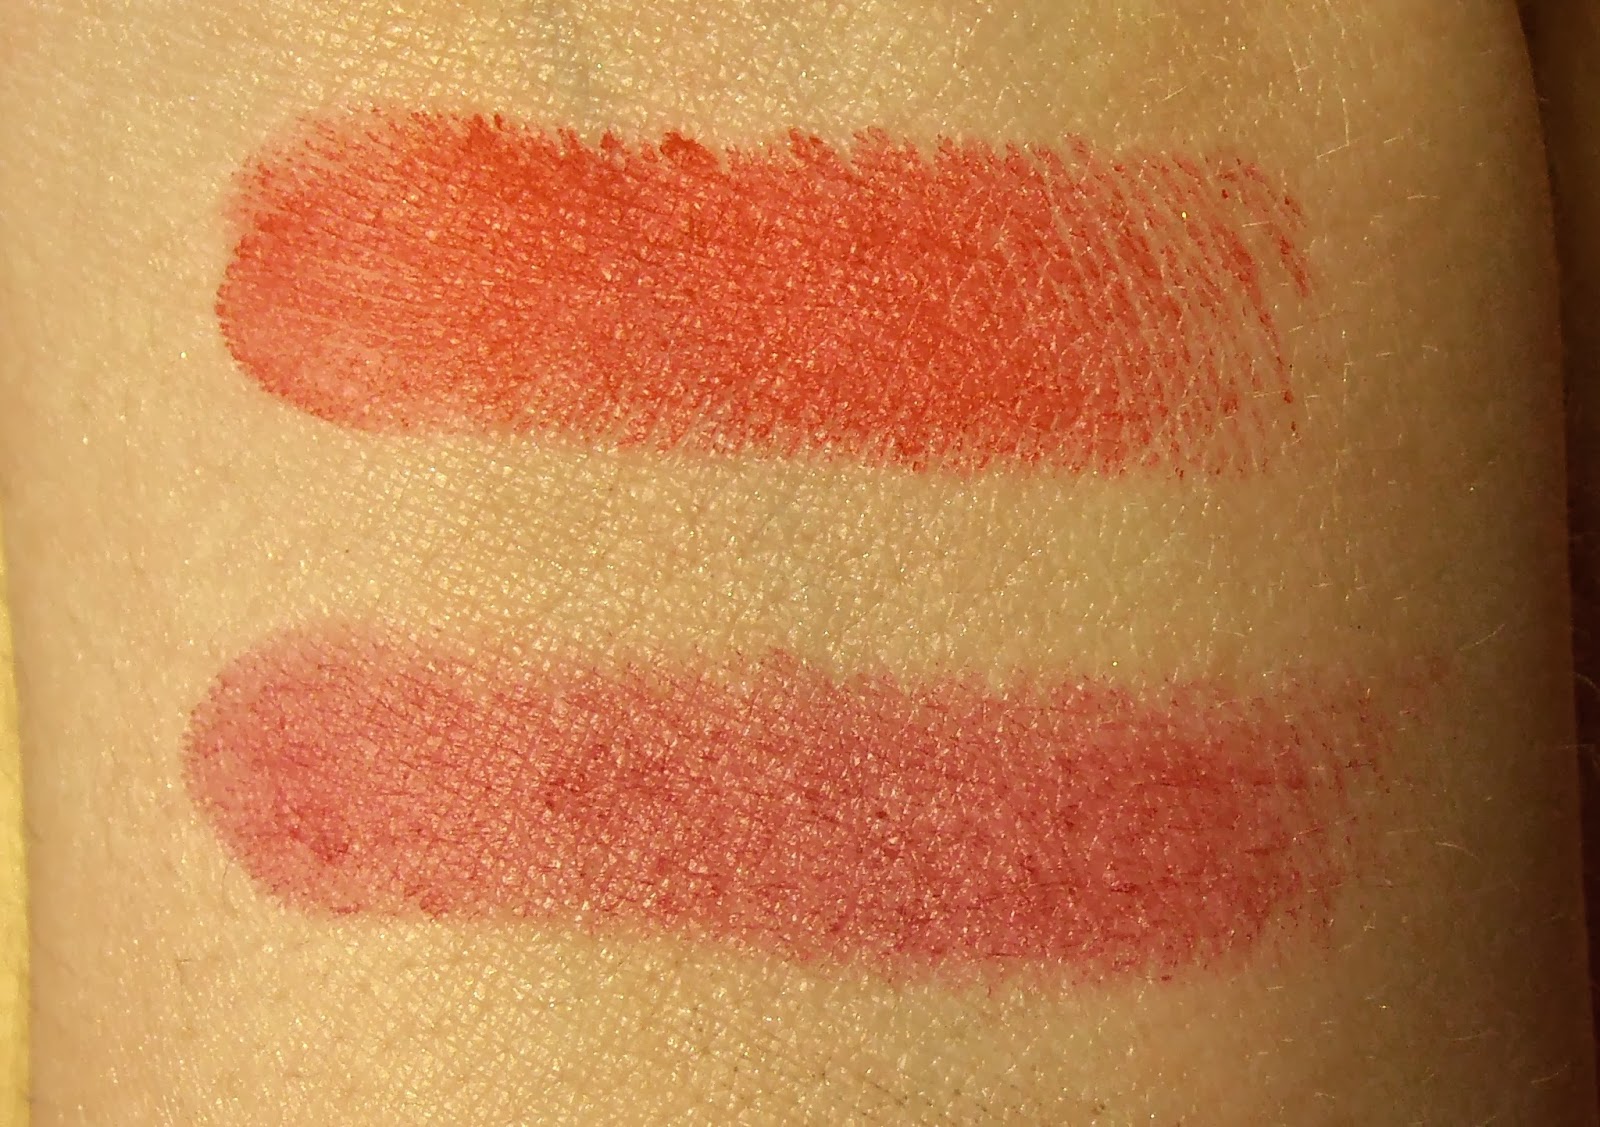
Next up are the two matte lipsticks. These were kind of disappointing for me.. On the site the red one looked a lot more raspberry, and the dark one was a lot more pigmented. They are also hard to get the colour on the lips. I felt like I really had to push the lipstick, which actually dented the lipstick with the other side of the tube.. honestly.. I wouldn't recommend their matte lipsticks.. maybe their glossy lipsticks are better?


Swatches:


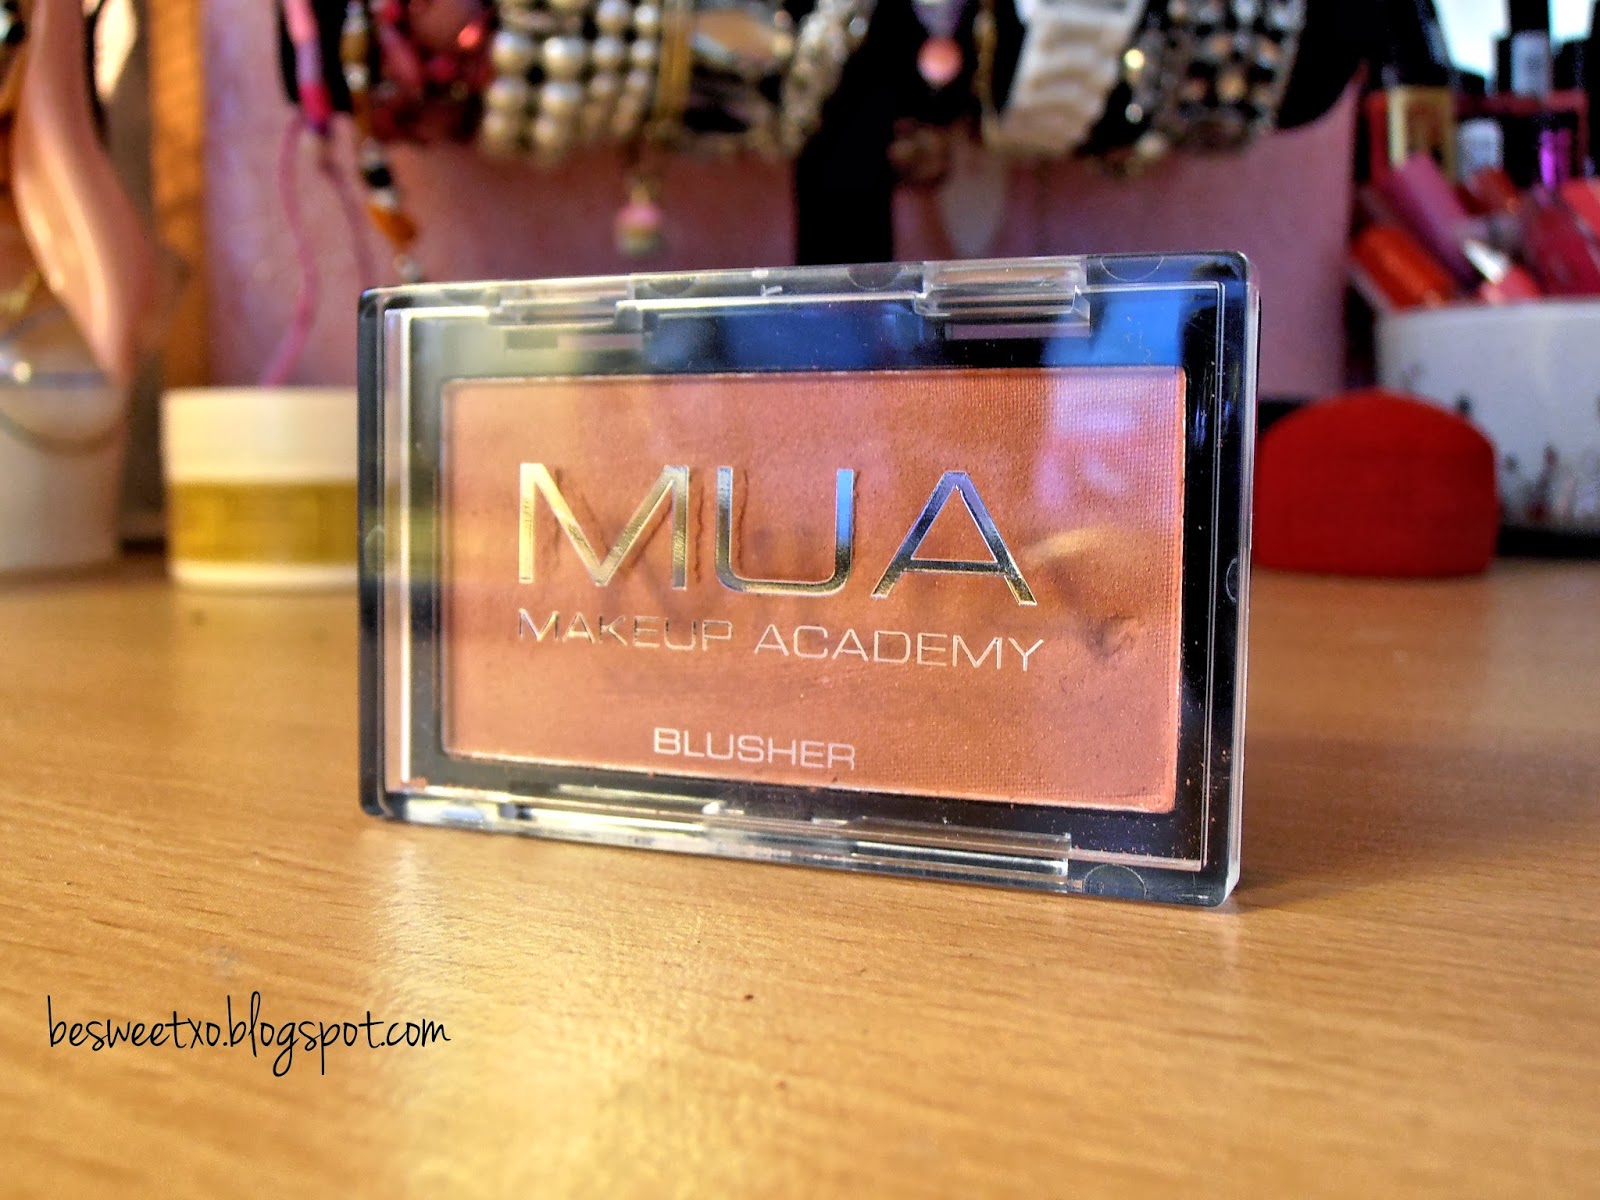
This blush is a good quality but has absolutely terrible packaging. The blush is a red-y brown colour  and goes on the skin smoothly, but the packaging was so hard to open that I felt like I was going to break it, and then when I did open it, my nail stuck into the product (which you can see). Maybe their new cream blushers are better but I wouldn't recommend these powder ones..


The MUA eyeliner is good for smudging, but I wouldn't suggest using it if you want a crisp line, I really like the sharpener lid though.


Swatches:


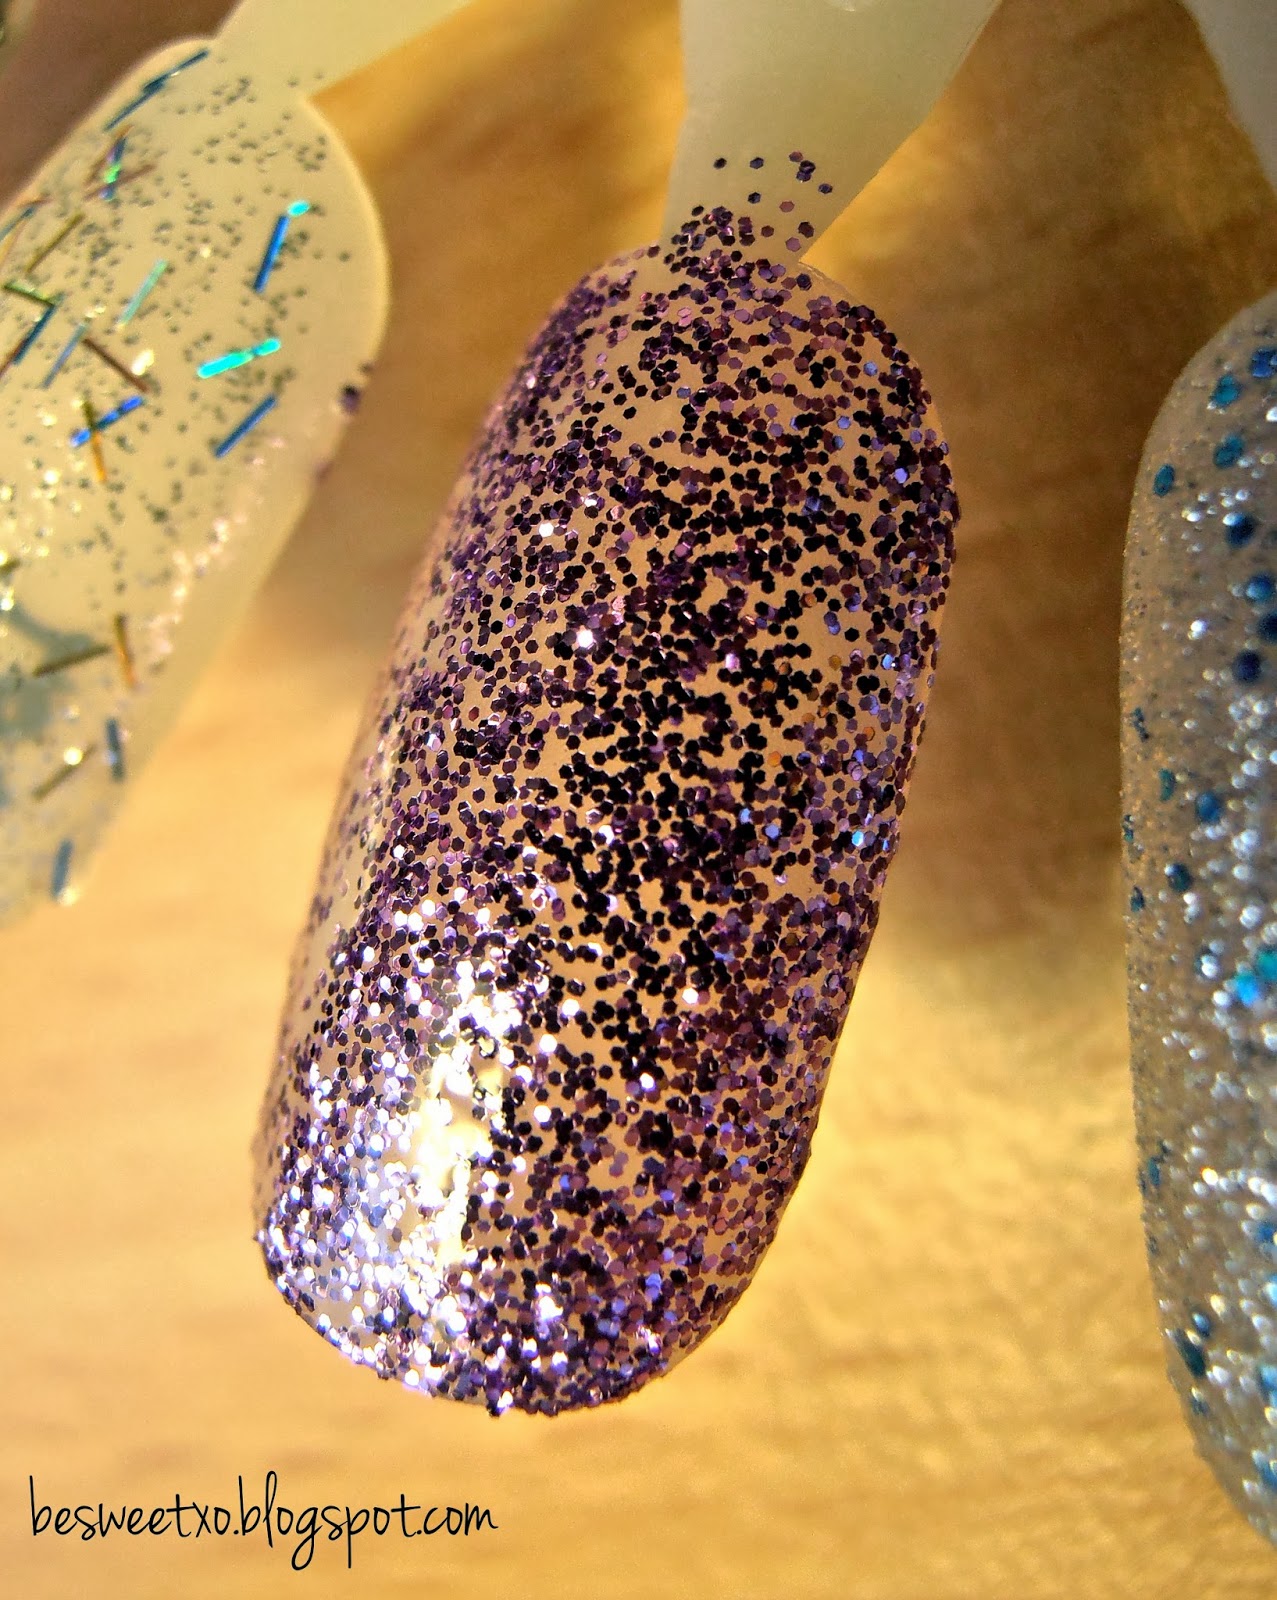
I'm pretty happy with the nail polish I chose. (part of the Fashionista range). It is a purple glitter with a clear base and isn't too thick or too thin and doesn't leave the nail patchy.


Swatch: this is 2 thick coats.


Lastly is the fake eyelashes. I haven't used these yet, but they feel like good quality, thick but not too thick that they look fake and the band isn't too thick either.


I hope you enjoyed my haul and reviews, everything written is my own opinion and everything in this post was bought with my own money.

- Beth :)

07/10/2013

Harley Quinn Makeup Look (Joker-themed) & Cosplay


Hey everyonee!
It's nearly half way through October which means Halloween is nearly here! I LOVE Halloween because I love any excuse to dress up in a costume~ Unfortunately in Australia Halloween isn't really celebrated apart from the younger generation so I probably won't be trick or treating :( One day I really want to celebrate Halloween in America and go trick or treating, I can't wait for that day! haha

As you might know from my Instagram or previous post I recently went to Movie World. (It was amazing btw) In Movie World people are dressed up as characters and they walk around and you can take photos with them, here's a few..

Wonder Woman


Batman 


Joker and Harley Quinn

I LOVED seeing the characters and being able to take photos of them/with them and my favourite ride was Arkham Asylum.. so with those two factors combined I started becoming interested in where Harley Quinn came from and her story is actually really interesting so I started to like her character. I saw other people cosplaying as her on the internet and I got inspired to do my own Harley Quinn look, so here it is! (And how I did it at the end :) )

(Disclaimer: I've never seen Harley in any movie, video, game or anything, I've only seen pictures, the person that was dressed up and was acting as her at Movie World - plus the voice over of her on Arkham Asylum and I've read up about her. To me she comes across as witty, confident, bubbly and psychotic soo I tried to bring all those sides of her into my photos, I don't usually pose like this haha)


I wanted to create a glam/girly/slightly wearable Harley Quinn look, I searched Google images for inspo and I decided to make my look based loosely on the Joker. I really like how it turned out!


This photo is supposed to reference the Joker with the cold stare, blackened eyes and red lips.


My brother had a Joker doll and a Batman doll, so I decided to include them in my pics ^^


I really liked how this picture turned out, you sort of can't tell I've taken it myself, to me it kinda looks like a moving shot. I kind of imagine in this picture she's looking at the Joker with admiration and like she's looking for him to approve of her (ref to her personality/story) Maybe I'm reading too much into the photo, but she's just so interesting! haha 


These two pictures are supposed to reference her witty confident side..


And lastly.. these two pictures are supposed to reference her cute and bubbly side ^^

Close Ups and how I did it!:


For the eye lids I first drew the outline with a black gel eyeliner, covering the entire lid and giving a cat/winged arch, I then patted black matte shadow over the entire lid and smudged some into the outer 2/3 of the lower lash line. To add shadow I blended a brown eyeshadow underneath the wing. I then filled my waterlines with black eyeliner and put mascara on top and bottom lashes. I then added false lashes.


For the card symbols I drew the black ones with black pencil eyeliner and the red ones with a red lip liner. The lip liner wasnt dark enough so I mixed some water with red eyeshadow and painted on top then added dry red eyeshadow to that.


For the lips (Joker inspired) I outlined my lips with a red lip liner then filled in my lips like normal with a red lipstick. I then used the lip liner to create a more subtle version of the Joker's symbolic smile lines. I drew it straight then smudged it just a little bit. I then got a dark burgundy lip stick and smudged that into the middle of my lips to give them a darker look.


For my face I used my regular BB cream (Garnier in light) and dusted it lightly in my usual powder (Australis Fresh and Flawless in Deep Natural). To make my skin lighter I used a little but of baby powder but I wouldn't recommend this if you're going somewhere as her as it clings to the hair and dry parts of
 your face (lucky you can't tell in the photos!)
For my cheeks I used my Models Prefer bronzer (any bronzer will do) for the hollows of my cheeks and contouring my nose. After that I used a brown eyeshadow for further contouring of my cheeks. I then used a hot pink blush on the apples of my cheeks and went over that  lightly with a red eyeshadow.

For my eyebrows I filled them in more than I usually do and I arched them a bit more than normally.

Then I put my hair in pigtails, leaving my fringe out and tied red ribbon over the bands.

Finally what you wear is up to you! In these photos I wore a black long sleeve dress I got from Cotton On but I saw a skirt in Kmart the other day that would be perfect for a Harley Quinn costume! It was like diamond black and white checkers. Or you could always order a costume on ebay~


Phew, what a long post! I hope you enjoyed my reading about the inspiration and the specifics of the looks and the many photos, and poses ><

If you do take inspiration from my look, please show me a picture I'd love to see it!


- Beth :)